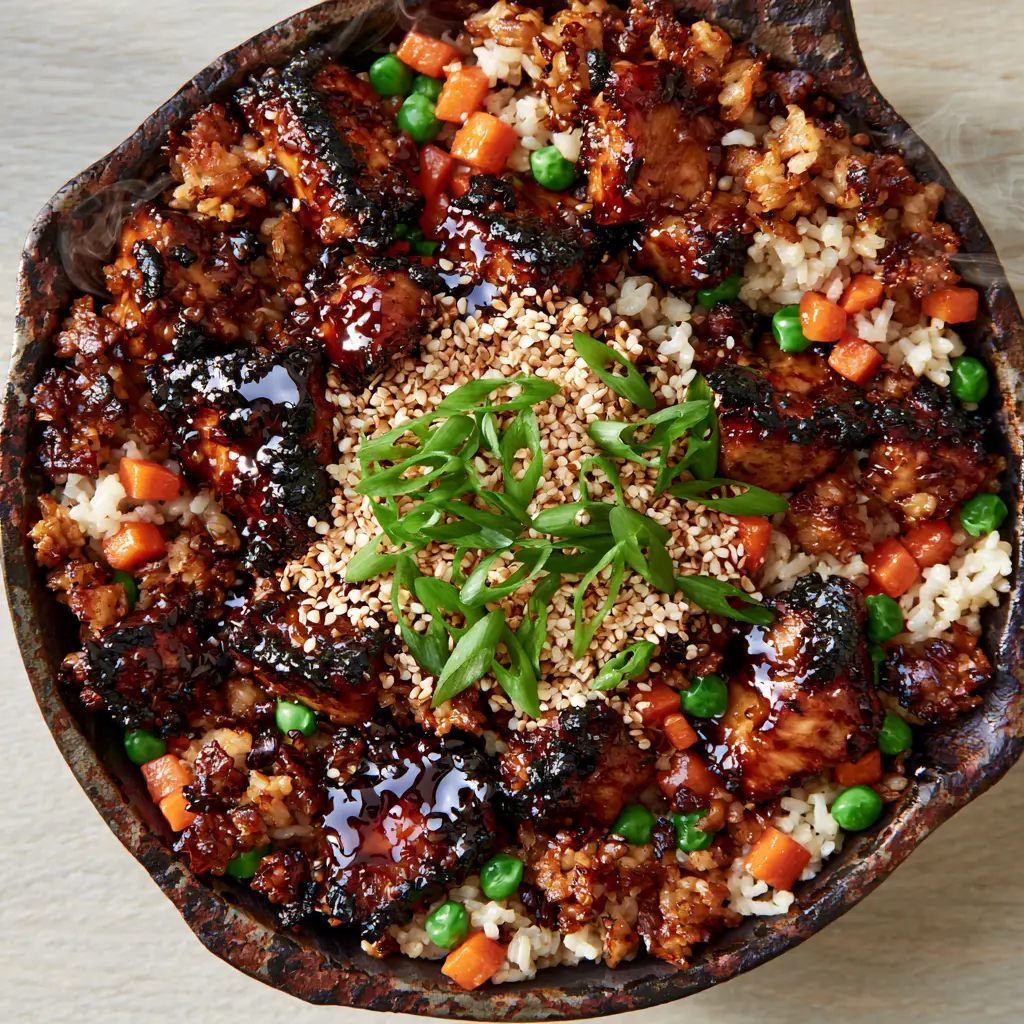
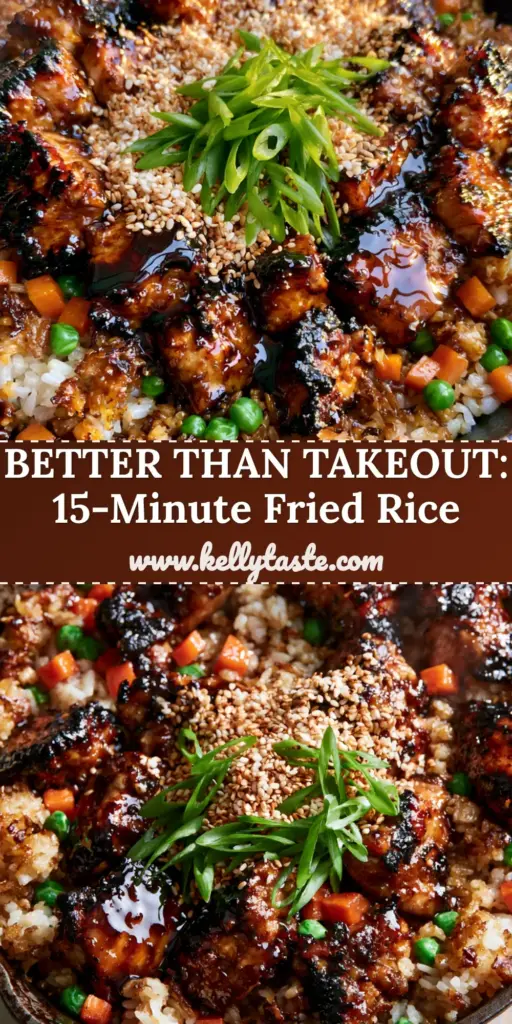
There is a specific kind of magic that happens when high-heat cast iron meets a sweet, savory glaze. This Teriyaki Chicken Fried Rice isn’t just another weeknight meal; it is a sensory experience defined by glistening, dark-reflective sauce and the irresistible crunch of golden-brown rice grains. If you have been searching for that restaurant-quality finish with deeply caramelized chicken and vibrant vegetables, you have found it.
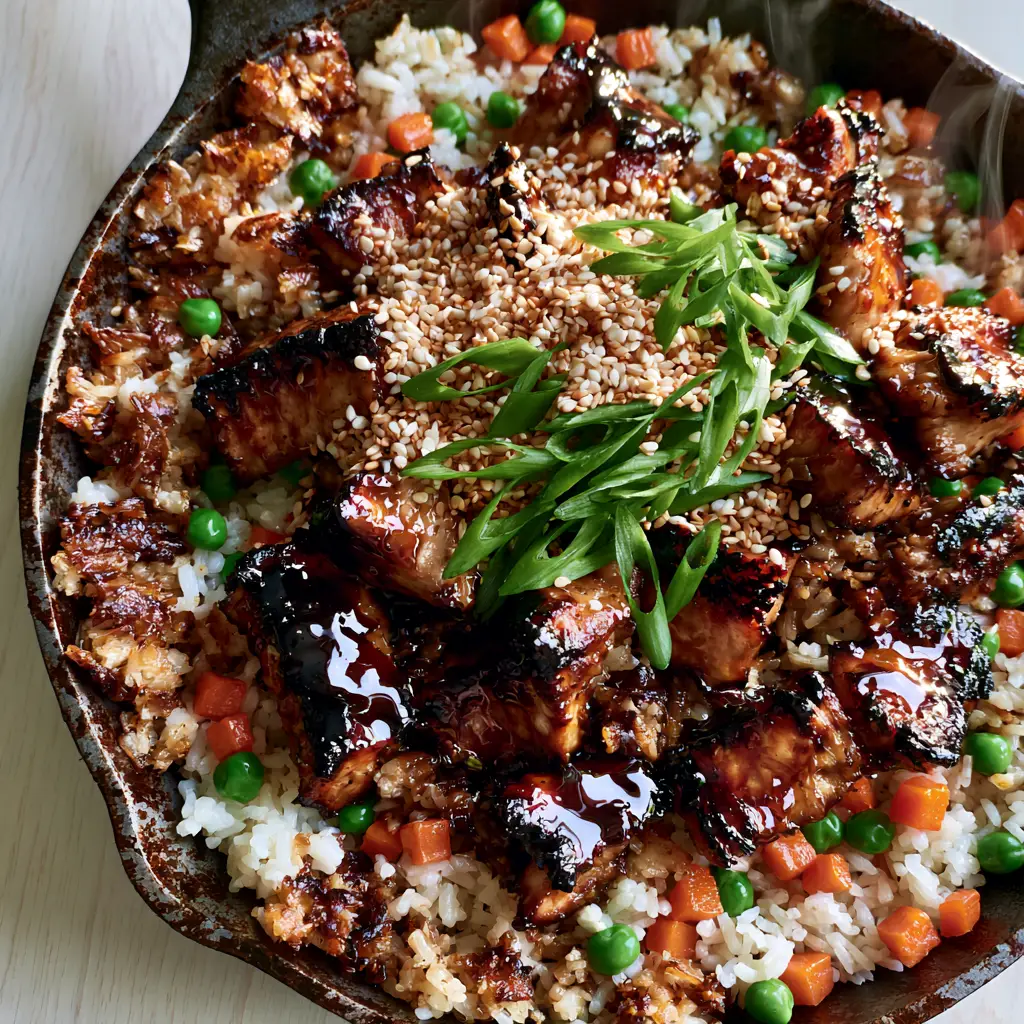
Imagine pulling a heavy skillet from the stove, the surface still crackling and releasing fine wisps of steam into the air. The chicken thighs are charred perfectly at the edges, offering a smoky contrast to the thick, glossy teriyaki coating. Every bite of this Teriyaki Chicken Fried Rice delivers a balance of soft jasmine rice and crispy, toasted bits that cling to the bottom of the pan.
This recipe bridges the gap between traditional stir-fry techniques and the bold, umami-heavy flavors of Japanese-inspired street food. We are moving beyond basic takeout and diving into a world of texture, color, and professional-grade searing that you can achieve right in your own kitchen.
The Anatomy of the Perfect Umami-Packed Stir Fry
Before we pick up the spatula, let’s talk about what makes this Teriyaki Chicken Fried Rice stand out from a standard chicken fried rice (coming soon). The secret lies in the layering of textures and the “forensic” attention to visual detail—from the emerald green of the peas to the reflective shine of the glaze.
- Charred, Succulent Chicken: By using chicken thighs and high heat, we create those sought-after caramelized edges while keeping the meat juicy.
- The “Crispy vs. Soft” Rice Dynamic: We use day-old jasmine rice to ensure the grains stay separate, allowing some to get golden-brown and crunchy while others remain tender.
- The Reflective Glaze: A homemade teriyaki reduction provides a thickness that clings to every ingredient, creating a dark, glistening finish that mimics professional photography.
- Vibrant Visual Contrasts: Small-diced orange carrots and bright green peas offer pops of color against the deep brown of the seasoned rice.
Essential Ingredients for Gourmet Teriyaki Results
To achieve the visual and flavor profile of this Teriyaki Chicken Fried Rice, each ingredient serves a scientific and aesthetic purpose. We aren’t just throwing things in a pan; we are building a masterpiece.
Boneless Skinless Chicken Thighs (1.5 lbs / 680g): Thighs are essential here because their higher fat content allows for high-temperature searing without drying out. This is how we achieve those beautiful charred edges described in our visual blueprint.
Day-Old Jasmine Rice (4 cups / 600g): Fresh rice is too moist and will turn to mush. Chilled, day-old grains have dehydrated slightly, which is the only way to get that mix of golden-brown crispy grains and soft white interiors.
Small-Diced Carrots (1/2 cup / 75g): Dicing these small ensures they cook through quickly during the high-heat stir-fry process. Their vibrant orange hue provides the primary color contrast against the dark glaze.
Vibrant Green Peas (1/2 cup / 75g): Whether fresh or frozen, these should be added at the very end. This preserves their “bright emerald green” color and prevents them from wrinkling or turning gray.
The Glossy Teriyaki Base: A combination of soy sauce (1/2 cup / 120ml), brown sugar (1/4 cup / 50g), and grated ginger creates the foundation. We add a cornstarch slurry (1 tbsp / 15g) to ensure the glaze becomes “thick, dark, and reflective.”
Toasted White Sesame Seeds & Scallions: These are your heavy garnishes. The seeds provide a nutty crunch and a visual “spray” across the top, while the scallions add a fresh, sharp bite to cut through the umami richness.
The Tool That Changes Everything: Why Cast Iron?
While many home cooks reach for a wok, this specific Teriyaki Chicken Fried Rice recipe is optimized for a rustic black cast iron skillet. The heavy metal retains heat better than thin carbon steel, which is vital for creating the “crispy jasmine rice” texture.
The flat surface area of a 12-inch (30cm) skillet allows more rice grains to make direct contact with the heat. This contact is what creates the “golden-brown crispy grains” mentioned in our Midjourney prompt. If you want that handheld smartphone photo aesthetic, the black patina of the cast iron provides the perfect rustic backdrop.
Mastering the Sear: Step-By-Step Culinary Instructions
Step 1: The High-Heat Chicken Foundation
Pat your chicken thigh chunks completely dry with paper towels. Heat 2 tbsp (30ml) of neutral oil in your cast iron skillet over medium-high heat until you see a faint wisp of smoke. Add the chicken in a single layer, resisting the urge to move it for 3-4 minutes.
You are looking for a specific sensory cue: the chicken should release easily from the pan once a “deeply seared, caramelized charred edge” has formed. Once flipped, cook for another 2 minutes and then remove the chicken, leaving the rendered fat in the pan.
Step 2: The Aromatic Sizzle
In the same skillet, add your small-diced carrots. Stir-fry for 2-3 minutes until they begin to soften but still retain a slight snap. This is the time to add your garlic and ginger, stirring constantly for 30 seconds until the aroma fills the kitchen—a key indicator that the flavors are “blooming.”
Step 3: Creating the Glistening Glaze
Whisk together your soy sauce, brown sugar, honey, and cornstarch slurry. Pour this into the skillet. Watch as the liquid begins to bubble and transform from a thin tea-like consistency into a “thick, dark, reflective umami glaze.” Once it coats the back of a spoon, you are ready for the rice.
Step 4: The Rice Toasting Technique
Add the chilled jasmine rice to the skillet, breaking up any clumps with your spatula. Toss the rice to coat it in the glaze, then press it down firmly against the bottom of the pan. Let it sit undisturbed for 2 minutes.
Listen for the crackling sound—this is the sound of the sugar in the teriyaki glaze caramelizing against the rice. Flip the rice to reveal those beautiful “golden-brown crispy grains” interspersed with “soft white grains.”
Step 5: The Final Assembly and Garnish
Fold the seared chicken and the vibrant green peas back into the rice. Toss for another 60 seconds just to heat everything through and ensure the peas stay emerald green. Remove from heat immediately to prevent the steam from wilting the fresh elements.
Pro Tips for Restaurant-Quality Results
- Don’t Overcrowd the Pan: If your skillet is too small, the chicken will steam rather than sear. Work in batches if necessary to ensure those charred edges.
- Rinse Your Rice (Before Cooking): If you are making the rice fresh the day before, rinse it until the water runs clear. Removing excess starch prevents the fried rice from becoming gummy.
- The Honey Secret: Adding a touch of honey to your teriyaki sauce increases the “reflective” quality of the glaze, giving it that professional, glistening look.
- Temperature Control: If the glaze is burning before the rice gets crispy, drop the heat to medium. The sugar content in teriyaki makes it prone to scorching if left unattended.
The Best Pairings for Your Teriyaki Feast
While this Teriyaki Chicken Fried Rice is a complete meal on its own, it pairs beautifully with other Asian-inspired textures. For a lighter side, try a Thai mango salad to provide a bright, acidic contrast to the heavy umami of the rice.
If you are hosting a larger gathering, consider serving this alongside a Japanese BBQ chicken fried rice for a side-by-side taste test of different glaze profiles. For those who love noodles, an edamame rice noodle salad offers a refreshing, cold accompaniment to the hot, sizzling skillet.
Frequently Asked Questions
It is not recommended. Fresh rice contains too much moisture, which leads to a mushy texture. For those ‘crispy jasmine rice’ grains, use day-old rice that has been chilled in the refrigerator.
You can, but breasts dry out faster at high heat. If using breast, cut them into smaller pieces and reduce the searing time slightly to keep them tender.
The secret is searing the chicken first in oil before adding any sauce. Once the chicken has developed caramelized charred edges, you then add the glaze to coat it.
For this specific style, yes. A cast iron skillet provides a flat, high-heat surface that is superior for creating a crust on the rice grains, which is harder to achieve in a rounded wok at home.
The combination of brown sugar, honey, and a cornstarch slurry creates a thick reduction that reflects light, giving it that professional ‘glistening’ appearance.
The Ultimate Teriyaki Chicken Fried Rice Recipe Card
Teriyaki Chicken Fried Rice: The Ultimate Crispy Cast Iron Skillet Recipe
Ingredients
Equipment
Method
- Heat oil in the cast iron skillet over medium-high heat. Add chicken chunks and sear for 4 minutes without moving until charred edges form.
- Flip and cook for 2 more minutes. Remove chicken from the pan but keep the rendered fat for flavor.
- Add carrots to the skillet and sauté for 3 minutes until tender-crisp.
- Pour in the teriyaki mixture. Stir constantly until it becomes a thick, dark, reflective glaze.
- Fold in the cold jasmine rice. Press down and let sit for 2 minutes to create crispy golden-brown edges.
- Add chicken and peas back in. Toss for 60 seconds until glistening and steaming.
Notes
Ensure the skillet is smoking hot before adding the chicken to get those charred edges.
Bring the Sizzle Home
There is nothing quite like the satisfaction of creating a dish that looks exactly like a professional food photograph. This Teriyaki Chicken Fried Rice combines the rustic charm of a cast iron skillet with the sophisticated flavors of a thick, dark umami glaze. The contrast between the charred chicken and the crispy grains of jasmine rice is a testament to the power of high-heat cooking.
If you enjoyed this recipe, please leave a comment below and let us know how your “crispy grains” turned out! Don’t forget to save this to your favorite boards on Pinterest so you can find it the next time those takeout cravings hit. Happy cooking!