When you hold a warm, freshly baked s’mores blossom cookies in your hand, you aren’t just holding a dessert; you are holding a handheld campfire memory. These cookies capture every essential element of the classic outdoor treat—the snap of graham crackers, the gooey stretch of toasted marshmallow, and the rich melt of milk chocolate.
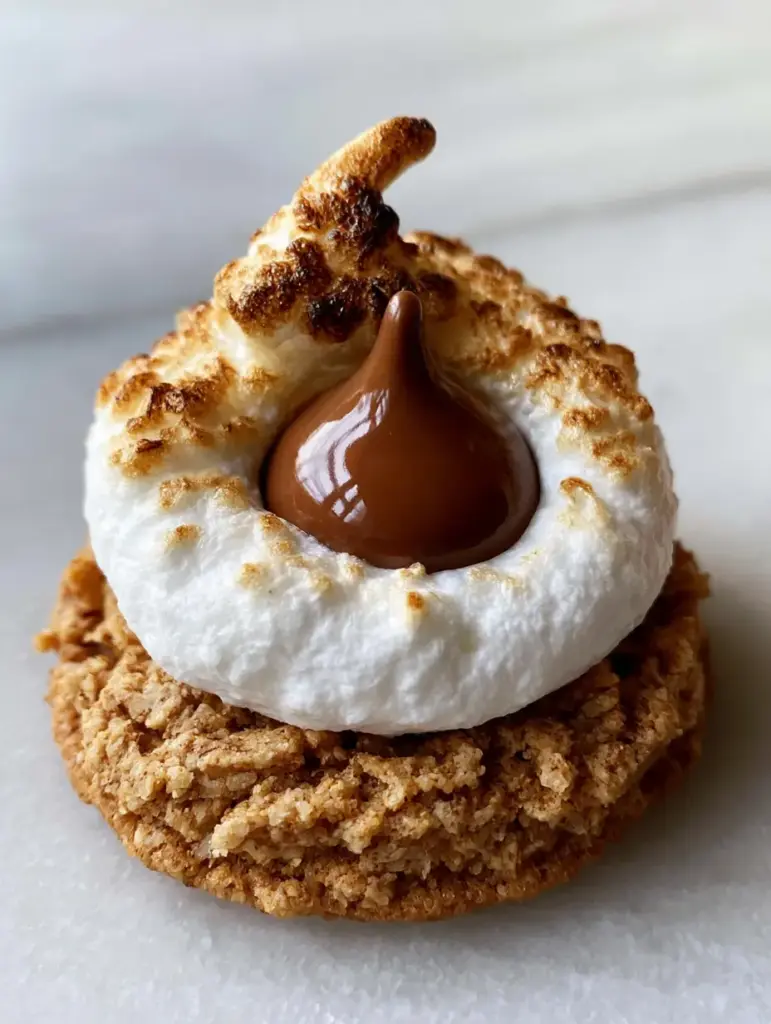
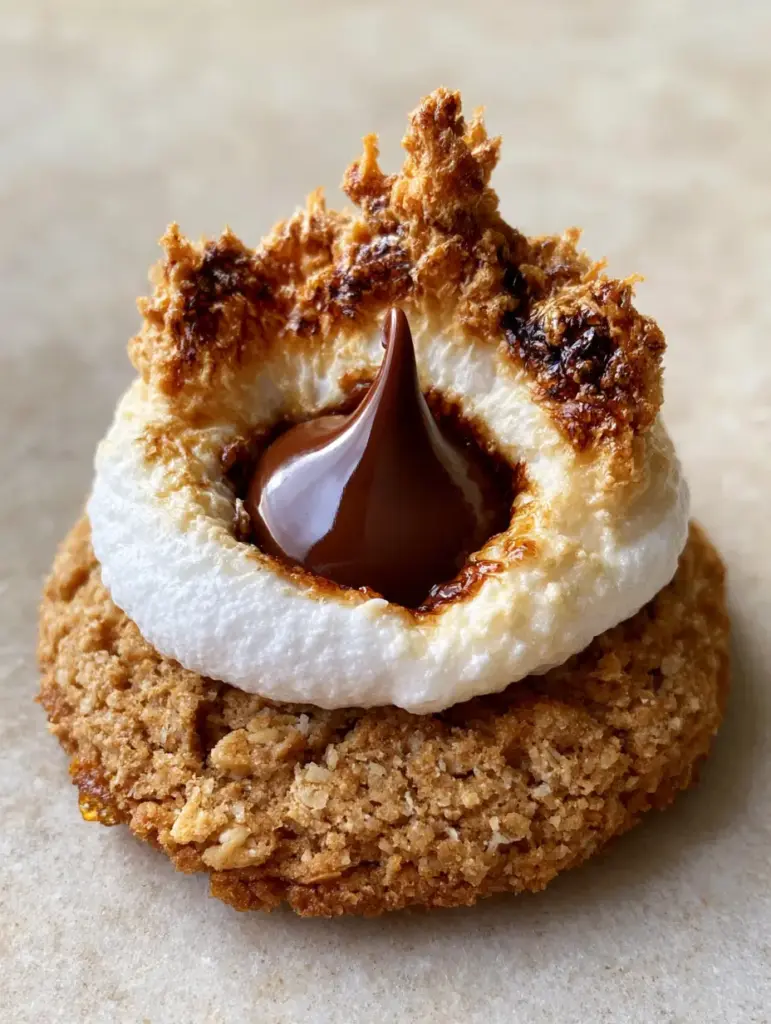
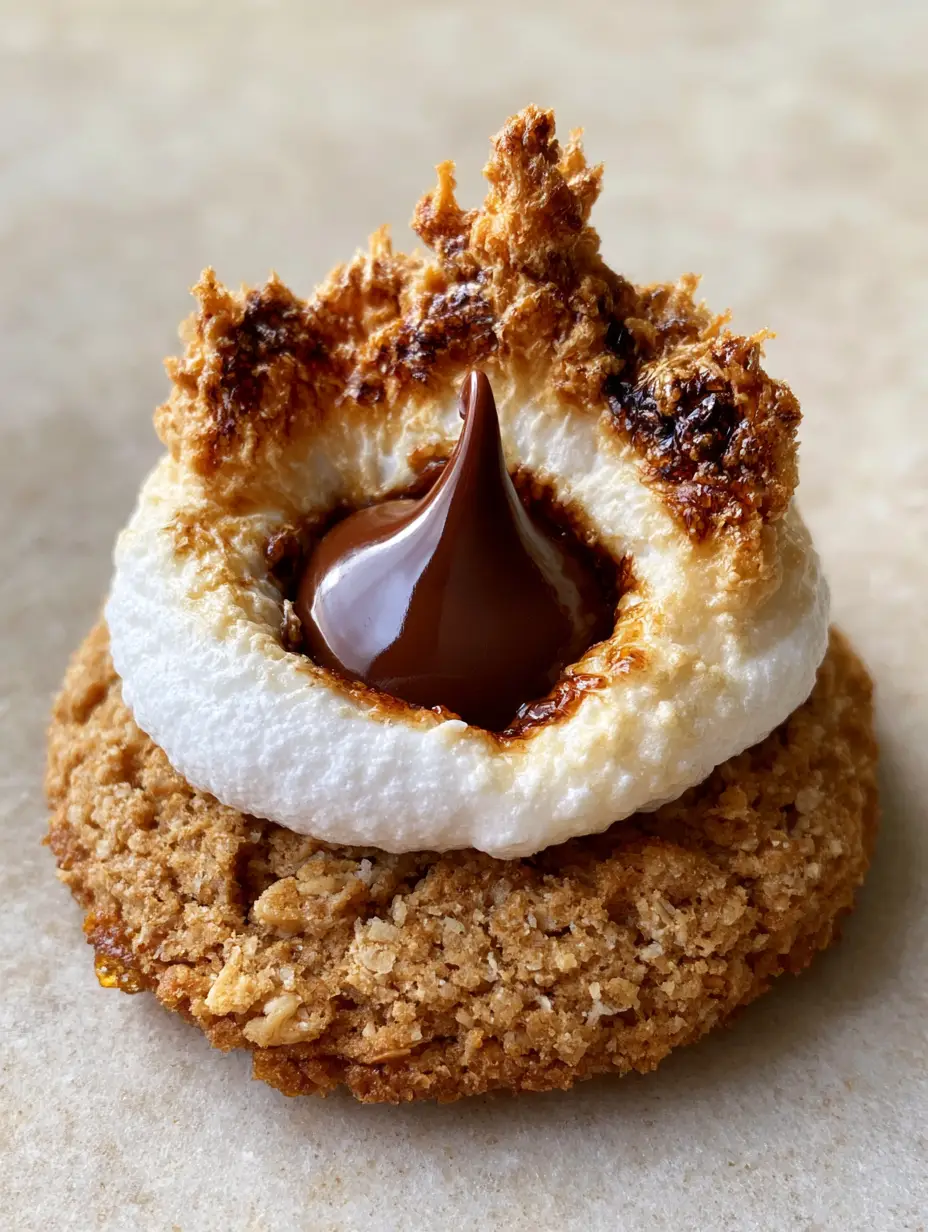
Designed to be thick, soft-baked, and visually stunning, these cookies feature a textured graham cracker base that provides a nostalgic crunch. The crown jewel is a puffed marshmallow, perfectly charred with golden-brown edges that look like they were pulled straight from a glowing ember.
Illuminated by natural morning light, the glossy, slightly melting milk chocolate Kiss in the center beckons for that first, messy bite. Whether you are craving a cozy indoor snack or a standout addition to your next bake sale, this recipe delivers professional results with a rustic, homemade charm.
Why These Graham Cracker Marshmallow Blossoms Are the Ultimate Crowd-Pleaser
- Textural Perfection: You get a soft-baked cookie base with visible textured crumbs that contrast beautifully against the pillowy marshmallow.
- The Perfect Char: We use a specific broiling technique to ensure every marshmallow has a caramelized, golden-brown charred crown.
- Melting Chocolate Center: By placing the milk chocolate Kiss at the precise moment, we achieve a glossy, softened texture without losing the iconic shape.
- No Campfire Required: Enjoy the smoky, sweet essence of a s’more from the comfort of your kitchen any time of year.
Essential Components for the Perfect S’mores Base
Unsalted Butter (1 cup / 225g): We use softened butter to create a rich, tender crumb that holds up to the heavy toppings. Ensure it is at room temperature to allow for proper aeration during the creaming process.
Brown Sugar (1 cup / 200g): This provides the necessary moisture and molasses depth that makes the cookie “soft-baked” rather than crunchy. It also complements the honey notes in the graham crackers.
Graham Cracker Crumbs (1.5 cups / 125g): These are folded directly into the dough and used as a coating to provide that signature visual texture. They act as a flavorful flour substitute, adding a toasted grain profile to every bite.
All-Purpose Flour (2 cups / 250g): This provides the structural foundation required to support the weight of a puffed marshmallow and a chocolate Kiss. It ensures the cookie remains thick and doesn’t spread into a flat pancake in the oven.
Large Marshmallows (12-15 pieces): These are halved horizontally to create a stable “nest” for the chocolate. When heated, they puff up to create the voluminous look seen in our visual blueprint.
Milk Chocolate Kisses (24-30 pieces): The classic choice for a blossom cookie, providing a creamy, melting center. If you want to experiment with different flavors, you could also try these with chocolate chips as seen in our s’mores chocolate chip cookies.
Professional Tools for Gourmet Results
To achieve the “handheld smartphone photo” quality, you need a heavy-duty baking sheet that distributes heat evenly. This prevents the “golden edges” from becoming “burnt bottoms” before the center is set.
A kitchen torch is optional but highly recommended for those who want absolute control over the charred crown. Otherwise, a reliable oven broiler will suffice to get those caramelized ridges on the marshmallow.
Using a cookie scoop (approximately 2 tablespoons) is vital for uniformity. Consistent sizing ensures that every cookie in the batch finishes baking at the exact same time, keeping the interiors soft and the edges just slightly crisp.
Step-by-Step Guide to Crafting s’mores blossom cookies
Phase 1: Preparing the Graham Cracker Dough
Start by creaming your 1 cup (225g) of softened butter with 1 cup (200g) of brown sugar and 1/2 cup (100g) of granulated sugar. Beat them on medium-high speed for at least 3 minutes until the mixture looks pale and fluffy.
Add in 1 large egg and 1 tsp (5ml) of pure vanilla extract, mixing until just combined. In a separate bowl, whisk together your flour, 1 cup of graham cracker crumbs, baking soda, and a pinch of salt.
Slowly incorporate the dry ingredients into the wet, being careful not to overwork the dough. Over-mixing leads to a tough cookie, whereas we are aiming for that soft-baked, tender texture.
Phase 2: Rolling and Coating for Texture
Scoop the dough into balls roughly 1.5 inches in diameter. Place the remaining 1/2 cup of graham cracker crumbs into a small bowl and roll each dough ball through the crumbs until thickly coated.
Place the balls on a parchment-lined baking sheet, spacing them 2 inches apart. Chill the tray in the refrigerator for 15 minutes; this prevents the cookies from spreading too thin and keeps them “thick” as described in the prompt.
Bake at 350°F (175°C) for 8-10 minutes. Look for the “visual cue” of the edges just beginning to turn a light golden brown while the center still looks slightly underdone.
Phase 3: The Marshmallow Transformation
Remove the cookies from the oven and immediately press a marshmallow half (cut side down) into the center of each warm cookie. Switch your oven to the broiler setting.
Place the cookies back in the oven on the top rack for 30-60 seconds. You must watch them like a hawk! The marshmallows will puff up and develop that caramelized, golden-brown charred crown in seconds.
Once you see the charred edges, pull the tray out. The marshmallows should look inflated and gooey, ready to receive the chocolate.
Phase 4: The Chocolate Kiss Finish
While the marshmallow is still piping hot and puffed, gently press a milk chocolate Kiss into the center. The heat from the marshmallow will cause the base of the chocolate to melt, securing it in place.
The chocolate will become glossy and slightly softened, creating that perfect “melting milk chocolate Kiss center” appearance. Allow them to cool on the tray for at least 10 minutes to set before moving them.
While these cookies are a decadent dessert, if you’re looking for something lighter for a summer brunch, consider pairing them with a fresh mango strawberry sunset cupcakes or even a refreshing greek yogurt waffles for a balanced spread.
Expert Tips for the Perfect Toasted Finish
- Freeze the Chocolate: Pop your chocolate Kisses in the freezer for 20 minutes before using them. This prevents them from melting into a puddle when they hit the hot marshmallow.
- The Cutting Secret: Use kitchen shears dipped in water to cut your marshmallows. This prevents sticking and ensures a clean, flat surface that adheres to the cookie.
- Freshness Matters: Use a fresh bag of marshmallows. Older marshmallows don’t puff as well and can become grainy when heated.
- Crumb Texture: Don’t pulverize the graham crackers into a fine dust for the coating; leave some small “textured crumbs” for a better visual and crunch.
Storage and Reheating Advice
These s’mores blossom cookies are best enjoyed within the first 24 hours while the marshmallow is at its peak gooiness. However, they can be stored in an airtight container at room temperature for up to 3 days.
If the marshmallows harden, simply pop a cookie in the microwave for 5-8 seconds. This will soften the base and return the marshmallow to its “puffed” and stretchy state.
We do not recommend freezing the fully assembled cookies, as the marshmallow texture can become rubbery upon thawing. Instead, freeze the unbaked dough balls and add the fresh toppings after baking.
What to Serve with S’mores Cookies
These cookies are incredibly rich, so they pair best with items that offer a bit of acidity or saltiness to cleanse the palate. If you are serving these at a party, balance the sweetness with some dill pickle saltines for a salty-tangy contrast.
For a full dessert flight, these cookies look beautiful next to fruit-forward treats. The deep chocolate and toasted notes are a great follow-up to a light meal featuring a vibrant salad.
Frequently Asked Questions
Yes, the graham cracker cookie dough can be made and refrigerated for up to 48 hours. Ensure it’s tightly wrapped to prevent it from drying out.
You can, but they won’t provide the same ‘puffed’ visual effect. For the best look, use large marshmallows halved horizontally to create a substantial nest for the chocolate.
The crumbs provide the essential s’mores flavor and texture. Replacing them entirely with flour will result in a standard sugar cookie rather than a s’mores base.
Use your oven’s broiler setting on high. Place the cookies on the top rack and watch them closely for 30-60 seconds until the edges turn golden brown and charred.
The cookies or marshmallows were likely too hot. Try freezing your chocolate Kisses before placing them on the marshmallow to help them retain their iconic shape.
The Ultimate s’mores blossom cookies Recipe
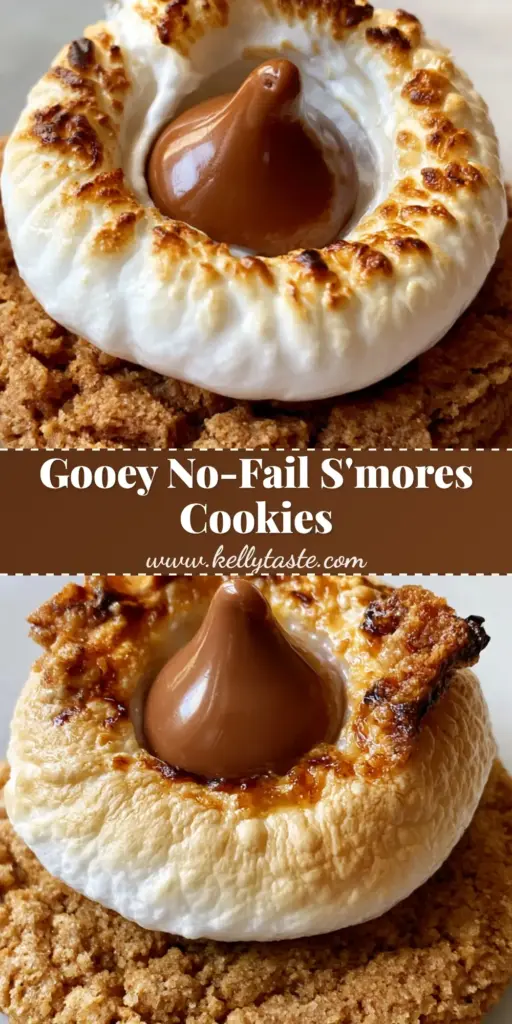
s'mores blossom cookies: The Ultimate Toasted Marshmallow Treat
Ingredients
Equipment
Method
- In a large bowl, cream together softened butter, brown sugar, and granulated sugar until light and fluffy, about 3 minutes.
- Mix in the egg and vanilla extract until well combined.
- Whisk flour, 1 cup of graham cracker crumbs, baking soda, and salt. Gradually add to the wet ingredients until a soft dough forms.
- Roll dough into 1.5-inch balls. Roll each ball in the remaining graham cracker crumbs until coated with visible textured crumbs.
- Place on a baking sheet and bake at 350°F (175°C) for 8-10 minutes until the edges are just set and golden.
- Remove cookies from oven; press a marshmallow half onto each. Broil for 30-60 seconds until the marshmallow is puffed and has golden charred edges.
- Immediately press a milk chocolate Kiss into the center of the warm marshmallow until it looks glossy and slightly melting.
Notes
Use a kitchen torch if you prefer a more controlled, campfire-style char on your marshmallows.
Closing & Call to Action
These s’mores blossom cookies are the perfect bridge between a classic comfort food and a gourmet bakery-style treat. With their charred marshmallow crowns and melting chocolate centers, they are guaranteed to be the star of your kitchen.
If you enjoyed this recipe, please leave a comment below and let us know how your toasted marshmallows turned out! Don’t forget to follow us on Pinterest and share your baking photos with the community.
For more indulgent inspiration, check out our latest dessert creations and seasonal favorites. Happy baking!