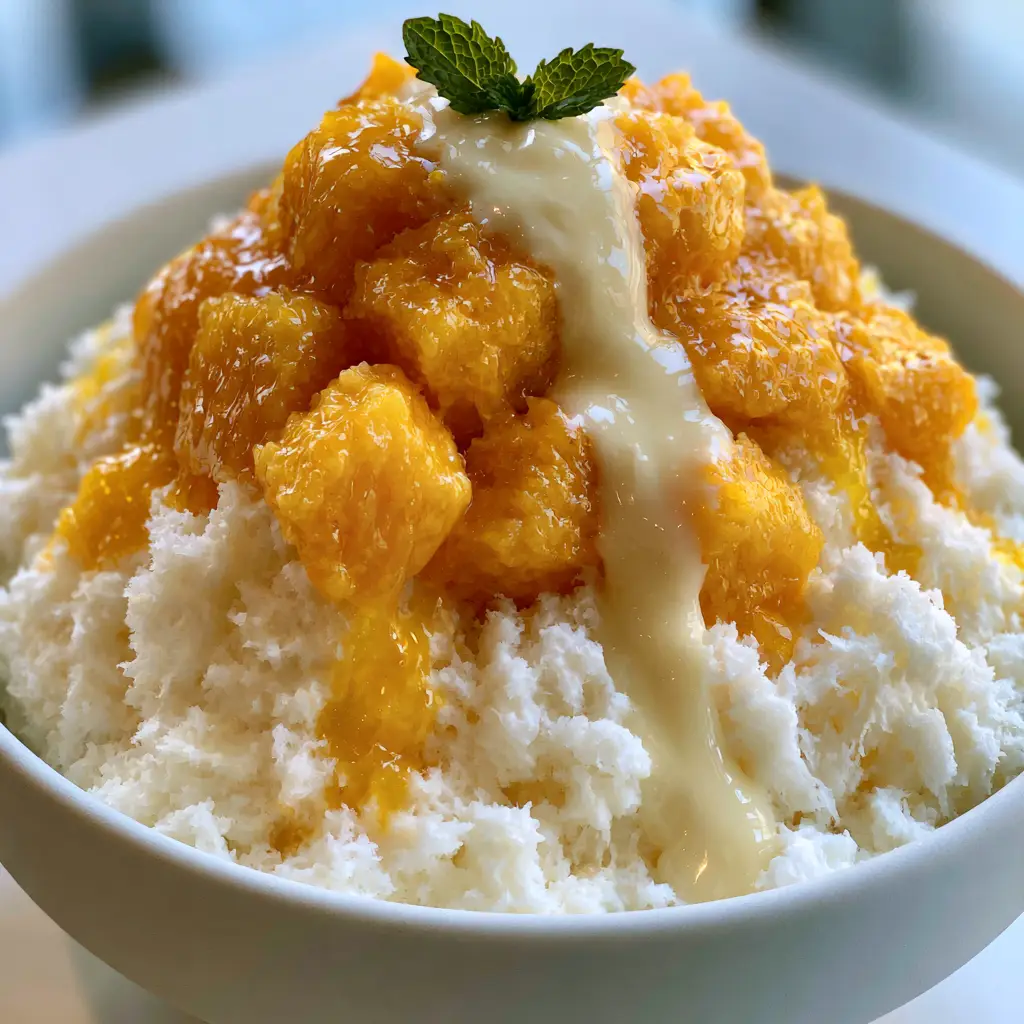
There is nothing quite like the sensory experience of a mango bingsu on a sweltering afternoon. Imagine a minimalist white ceramic bowl, catching the soft, natural side-lighting from a nearby window, piled high with a mountain of ultra-fluffy, crystalline snowy white milk ice flakes.
As you take a silver dessert spoon and submerge it into the icy peak, you lift a perfect spoonful of snow and vibrant orange-yellow honey mango. The fruit is glistening and juicy, providing a startling contrast to the pristine white ice that melts the moment it touches your tongue.
This recipe brings the authentic Seoul dessert cafe experience directly to your kitchen. We are focusing on that specific handheld smartphone photo aesthetic—glossy ribbons of ivory sweetened condensed milk cascading over perfectly cubed fruit, topped with a single tiny bright green mint sprig.
The Science of the Perfect Snowy Milk Base
To achieve the “crystalline” texture seen in high-end Korean cafes, we don’t use plain water ice. Traditional mango bingsu relies on a frozen milk base that, when shaved, creates a texture more akin to freshly fallen snow than a crunchy snow cone.
By using whole milk with a higher fat content, we ensure the flakes are soft and creamy rather than sharp and icy. The addition of a small amount of sweetened condensed milk directly into the liquid before freezing lowers the freezing point just enough to keep the snow “fluffy” and easy to shave.
If you love the tropical profile of this dessert, you might also enjoy exploring our vibrant Thai mango salad for a savory-sweet contrast or a creamy mango mousse cake for a more decadent celebration.
Essential Components for the Perfect Snowy Base
- 2 cups (480ml) Whole Milk: The high fat content is non-negotiable for creating that snowy, opaque white texture that doesn’t melt instantly.
- 2 tbsp (30ml) Sweetened Condensed Milk: This is mixed into the base to add a hint of sweetness and create a softer “shave” for the ice.
- 2 Large Honey Mangoes (Ataulfo): These are prized for their lack of fibers and deep orange-yellow hue, looking incredibly juicy and glistening when cubed.
- 1/4 cup (60ml) Extra Sweetened Condensed Milk: Used for the final drizzle to create those iconic viscous, ivory ribbons over the fruit.
- 1-2 Fresh Mint Leaves: A tiny bright green sprig provides the essential color pop at the very peak of the ice mountain.
Professional Equipment for Shaved Ice Success
To get the results shown in our visual blueprint, a high-powered blender or a dedicated Korean bingsu machine is ideal. If you are using a blender, the key is the “pulse” function to avoid over-processing the ice into slush.
You will also need a minimalist white ceramic bowl to make the colors of the mango and mint truly stand out. A sharp chef’s knife is required to get those “perfectly cubed” mango chunks without bruising the delicate fruit flesh.
Step-By-Step Instructions for Mango Bingsu Mastery
Preparing the Signature Milk Ice
In a small pitcher, whisk together 2 cups (480ml) of whole milk and 2 tbsp (30ml) of sweetened condensed milk. Pour this mixture into a heavy-duty freezer bag or ice cube trays and freeze for at least 6-8 hours until solid.
Once frozen, let the milk ice sit at room temperature for about 3-5 minutes. This “tempering” process is a pro-secret that allows the ice to shave into crystalline flakes rather than hard chunks.
Cubing the Honey Mangoes
Slice the honey mangoes along the pit. Score the flesh into a 1/2-inch (1.25cm) grid pattern, being careful not to cut through the skin. Invert the mango half to pop the cubes out, then gently slice them away from the skin.
You want the mango to look vibrant and glistening. If the mango feels a bit dry, toss the cubes gently in a teaspoon of simple syrup to give them that high-resolution food photography glow.
Shaving and Assembling the Snow
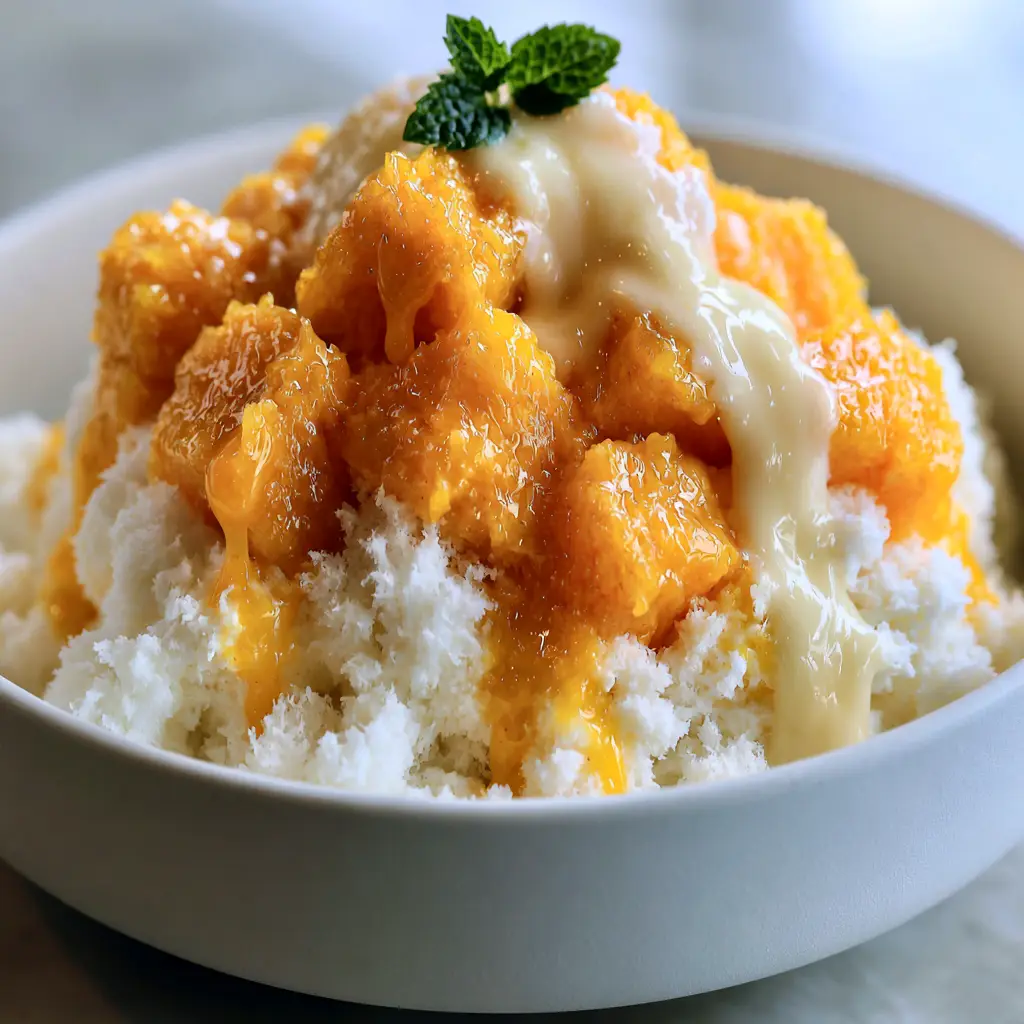
Place your frozen milk cubes into a blender or bingsu machine. Pulse rapidly until the ice transforms into ultra-fluffy white flakes. Transfer the “snow” immediately into your chilled white bowl, piling it high into a mountain shape.
Work quickly to prevent melting. The goal is to maintain the “crystalline” structure that catches the light. If you find yourself craving more mango-infused treats, check out our mango strawberry sunset cupcakes for your next baking project.
The Final Decorative Drizzle
Generously top the milk snow with your glistening mango cubes. Take your ivory sweetened condensed milk and, using a spoon or a squeeze bottle, create a thick, viscous stream over the top. Let it create glossy ribbons that cling to the mango and seep into the ice crevices.
Finish by placing a single, tiny bright green mint sprig at the very peak. Serve immediately with a silver dessert spoon, making sure to capture both the fruit and the snow in every bite.
Expert Tips for Success
- Chill Your Bowl: Place your ceramic bowl in the freezer for 20 minutes before assembling to keep the milk snow from melting at the base.
- Choose Honey Mangoes: Avoid the large green/red Tommy Atkins variety; they are too fibrous. Honey (Ataulfo) mangoes provide the “orange-yellow” buttery texture required.
- Control the Pulse: If using a blender, don’t just turn it on. Short, sharp pulses prevent the motor heat from melting your crystalline flakes.
- The Drizzle Temperature: Keep your condensed milk at room temperature. If it’s too cold, it won’t create those beautiful, flowing “glossy ribbons.”
Storage and Freshness Advice
Mango bingsu is a “live” dessert meant to be eaten immediately. Because the milk ice is so fluffy and aerated, it will lose its crystalline structure within 10-15 minutes of assembly.
You can, however, prep the milk base and freeze it for up to 2 weeks. The mangoes are best cut fresh, but can be stored in an airtight container in the fridge for 24 hours. Never freeze the assembled bingsu, as it will turn into a solid block of ice.
What to Serve With This Refreshing Treat
Since this is a light, fruit-forward dessert, it pairs beautifully after a spicy meal. Consider serving it after a bowl of spicy Korean fire noodles or a fresh Thai shrimp noodle salad.
For a full “Mango Festival” spread, you could even offer small slices of mango tres leches cake on the side for those who want varying textures of the same fruit.
Frequently Asked Questions
Yes! You can freeze the milk mixture in a freezer bag and crush it with a rolling pin, or use a high-powered blender on the ‘pulse’ setting to achieve snowy flakes.
Yes, full-fat coconut milk or sweetened almond milk work well, though the texture may be slightly more ‘icy’ and less ‘snowy’ than dairy milk.
The secret is to chill your serving bowl in the freezer for at least 20 minutes before assembly and work in a cool environment away from direct sunlight.
Honey mangoes (also known as Ataulfo or Champagne mangoes) are the best because they are non-fibrous, buttery, and have a vibrant orange-yellow color.
This usually happens if the ice is too cold or processed too long. Let your milk ice ‘temper’ at room temperature for a few minutes before blending to get softer flakes.
The Perfect Mango Bingsu Recipe
Mango Bingsu: The Ultimate Fluffy Korean Shaved Ice Recipe
Ingredients
Equipment
Method
- Whisk whole milk and 2 tbsp condensed milk. Pour into a freezer bag or ice tray and freeze until rock solid (6-8 hours).
- Slice and cube the honey mangoes into uniform 1/2-inch pieces. Ensure they look juicy and glistening.
- Pulse the frozen milk in a blender until it reaches a crystalline, ultra-fluffy snowy white texture.
- Pile snow in a chilled bowl. Top with mango cubes, drizzle with condensed milk to create glossy ribbons, and add the mint leaf.
Notes
Temper the ice for 3 minutes before blending for the fluffiest result.
Join the Community!
Did you manage to capture that perfect “glossy ribbon” drizzle on your mango bingsu? We want to see your snowy creations! Tag your photos with #KellyTaste and follow us on Pinterest for more visual recipe inspiration.
If you loved this refreshing Korean dessert, don’t forget to leave a comment below and let us know your favorite fruit toppings. Sharing our recipes helps us continue to provide high-quality culinary guides for home cooks everywhere!