When it comes to hosting, nothing beats a dish that looks as professional as a catered event but comes together in minutes in your own kitchen. These Cheesy Italian Pinwheels are the answer to every busy host’s prayers. Imagine a handheld smartphone photo of a rustic wooden board, stacked high with perfectly tight spirals, showcasing vibrant layers of emerald green, marbled pink, and bright orange. This isn’t just a snack; it is a culinary masterpiece designed to be the center of attention. Whether you are prepping for a Sunday game or a sophisticated garden party, the visual contrast of the dark red spicy pepperoni against the translucent ivory provolone ensures these wraps disappear as fast as you can plate them.
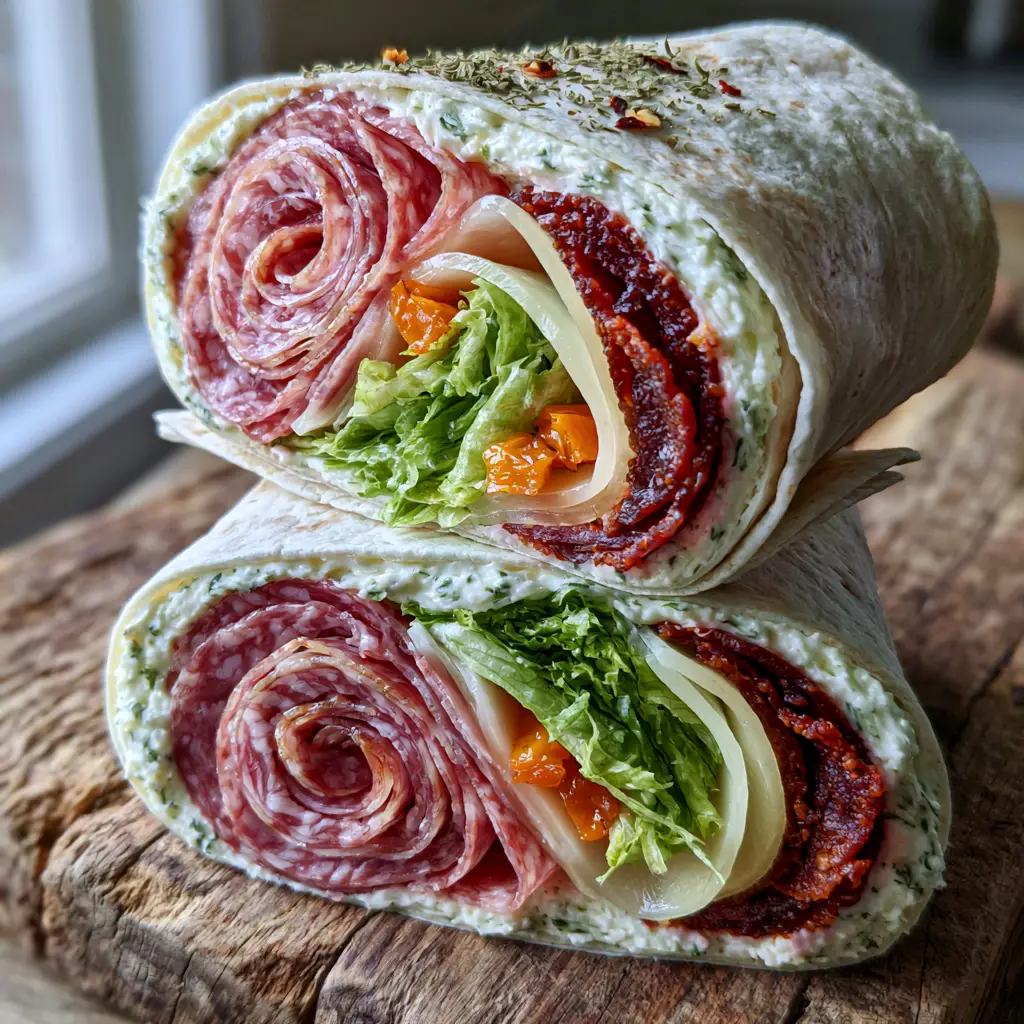
The secret to the perfect Cheesy Italian Pinwheels lies in the “culinary forensics” of the build. We aren’t just slapping meat on bread; we are constructing a structural marvel that maintains its “clean, sharp cross-sections” without a hint of sogginess. By using a thick foundation of herb-flecked white cream cheese, we create a moisture barrier that keeps the large flour tortilla soft and pliable while locking in the juices of the roasted red peppers and crisp romaine lettuce. The result is a bite that offers a gentle glow of textures, from the creamy spread to the snap of the fresh greens, all highlighted by the subtle heat of crushed red pepper flakes.
Why These Zesty Italian Tortilla Wraps Will Steal the Show
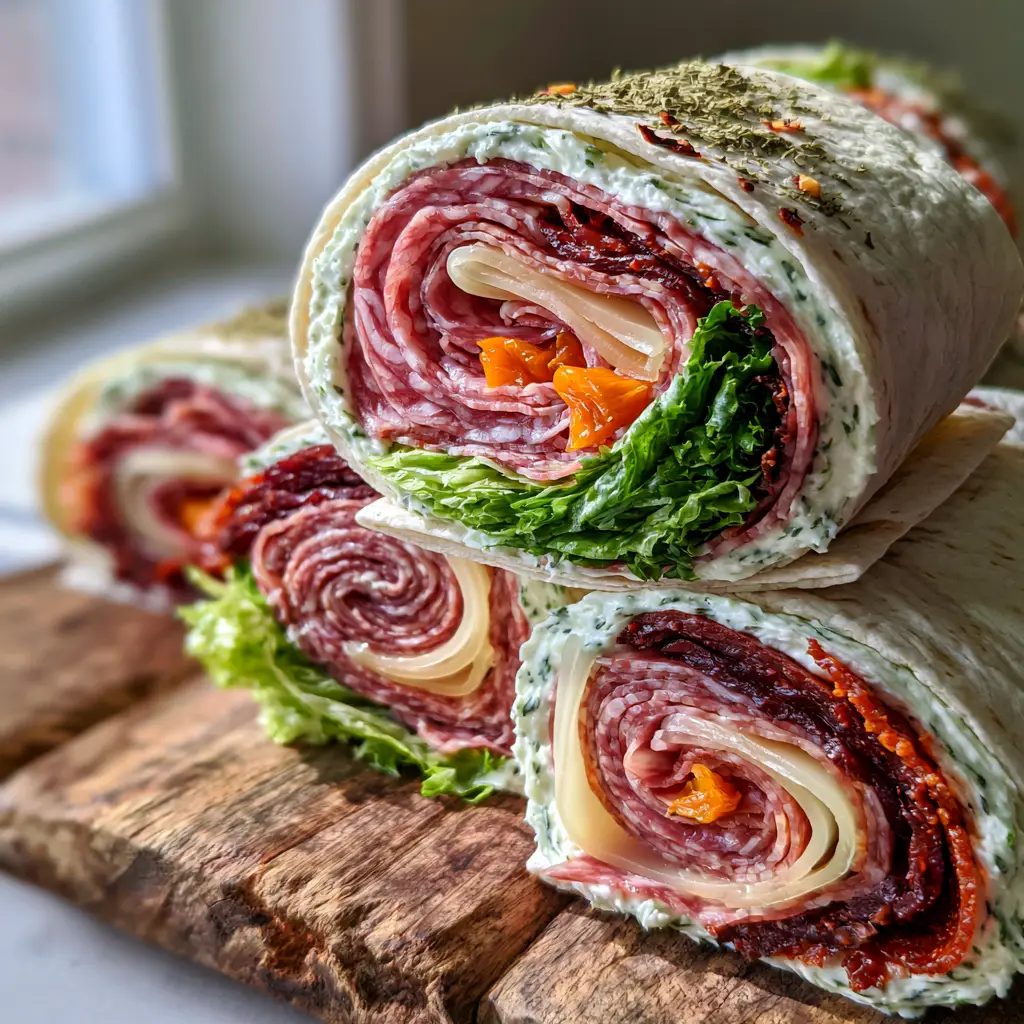
- Visual Perfection: The distinct, tight spirals of paper-thin marbled pink Genoa salami and dark red spicy pepperoni create a professional look that is “smartphone-photo” ready.
- Structural Integrity: Thanks to a strategic chilling process, these pinwheels offer clean, sharp cuts that won’t fall apart or become mushy on the platter.
- Flavor Complexity: The herb-infused cream cheese spread provides a cool, tangy contrast to the salty deli meats and the piquant kick of dried oregano.
- Make-Ahead Friendly: These actually improve with time, making them the ultimate low-stress solution for meal prep or entertaining.
The Pantry Staples for This Flavor-Packed Italian Spiral
To achieve the elite results seen in our “Visual Recipe Blueprint,” every ingredient serves a specific purpose. We don’t just use cream cheese; we use a curated blend of seasonings to elevate the base.
Large Flour Tortillas (10-inch/25cm): These serve as the canvas. You want a soft, room-temperature tortilla to prevent cracking during the tight rolling process.
Herb-Infused Cream Cheese Spread: You will need 8 oz (225g) of softened cream cheese mixed with garlic powder and onion powder. This acts as the “glue” and the primary moisture barrier for the wrap.
Thin-Sliced Genoa Salami: We recommend 4 oz (113g) of paper-thin slices. The marbling provides essential fats that carry the flavor of the herbs across the palate.
Sliced Spicy Pepperoni: Use 3 oz (85g) of dark red pepperoni. The spice cuts through the richness of the cheese, providing that classic Italian deli profile.
Sliced Provolone Cheese: 6 oz (170g) of translucent ivory-colored provolone offers a mild, creamy finish. Ensure they are thin-sliced for easy rolling.
Finely Shredded Crisp Romaine Lettuce: About 1 cup (47g) provides the “emerald-green” core. It is vital to use the crispest leaves to ensure a fresh snap in every bite.
Diced Roasted Red Peppers: 1/2 cup (120g) of jarred peppers, patted extremely dry. These “tiny gems of bright orange” add a smoky sweetness and essential visual pop.
Dried Oregano & Crushed Red Pepper Flakes: A light dusting of these (approx. 1 tsp (5ml) each) over the top provides the final aromatic touch and a hit of visual texture.
Essential Gear for Perfect, Non-Soggy Pinwheels
While this is a no-bake recipe, the tools you use will dictate the “sharpness” of your final cut. To replicate the professional look of our Cheesy Italian Pinwheels, you need the right edge.
A high-quality serrated knife is non-negotiable; it allows you to saw through the layers of meat and cheese without compressing the tortilla. You will also want a large cutting board and plenty of plastic wrap to ensure the logs are wrapped tightly during the chilling phase. Finally, a few paper towels are necessary to pat down the roasted red peppers to remove excess moisture, preventing the “soggy” disaster often found in lesser recipes.
Step-by-Step Guide to Rolling Professional-Grade Cold Cut Rounds
Phase 1: Preparing the Herbaceous Foundation
In a small bowl, combine your 8 oz (225g) of softened cream cheese with 1 tsp (5ml) of dried oregano and a pinch of garlic powder. Use a rubber spatula to whip the mixture until it is light and airy. Spread a thick, even layer over the entire surface of each tortilla, leaving only a 1/2-inch (1cm) border at the very top edge to act as a seal.
Phase 2: Layering the Italian Meats and Cheeses
Lay the translucent ivory provolone slices across the bottom two-thirds of the tortilla. Overlay the marbled Genoa salami, followed by the spicy pepperoni. Ensure the meats are slightly overlapping to create those “distinct, tight spirals” when sliced. This layering technique ensures that every single bite contains a perfect ratio of meat to cheese.
Phase 3: Adding the Fresh Core and Visual Accents
Distribute the finely shredded romaine lettuce and the tiny gems of bright orange roasted red peppers over the center of the meat layers. Be careful not to overstuff the core, or the tortilla may tear. Sprinkle a few crushed red pepper flakes directly onto the lettuce for an internal flavor burst.
Phase 4: The Tight Roll and Essential Chill
Starting from the bottom edge, roll the tortilla as tightly as possible, tucking the ingredients in as you go. Once rolled, wrap the log tightly in plastic wrap, twisting the ends like a candy wrapper to compress the shape. Place the logs in the refrigerator for at least 2 hours. This “set time” is what allows the cream cheese to firm up, ensuring the cross-sections are “perfectly clean and sharp.”
Pro Secrets for the Tightest, Cleanest Slices
- Temperature Control: Never slice a room-temperature pinwheel. The cheese needs to be cold to resist the pressure of the knife.
- The Knife Technique: Use a long serrated bread knife and a gentle sawing motion. Do not press down hard; let the teeth of the blade do the work.
- Moisture Management: Always pat your roasted red peppers dry between two layers of paper towels. Any residual brine will travel into the cream cheese and ruin the texture.
- The End Trimmings: The ends of the roll are rarely pretty. Slice off the first half-inch and “discard” them (eat them!) to reveal the perfect spiral for your serving board.
Make-Ahead Strategies and Staying Power
These Cheesy Italian Pinwheels are the ultimate make-ahead lunch or appetizer. You can prepare the wrapped logs up to 24 hours in advance. In fact, the flavors of the dried oregano and garlic powder actually meld into the cream cheese more deeply after an overnight rest. Once sliced, they will stay fresh and visually stunning for about 4-6 hours if kept chilled. Avoid freezing these wraps, as the romaine lettuce and cream cheese will lose their structural integrity upon thawing.
The Best Sides to Pair with Zesty Meat and Cheese Rolls
To turn these pinwheels into a full meal or an expansive party spread, consider the balance of textures. If you want a crunchier accompaniment, these are fantastic when served alongside tangy dill pickle saltines. For a summer gathering, the brightness of these wraps pairs beautifully with a fresh peach and feta salad or a zesty mango salad.
If you’re leaning into the Italian theme, serve these after an appetizer of Italian turkey focaccia sandwiches for a variety of bread textures. For those who enjoy a bit of global fusion, the spicy pepperoni notes in the Cheesy Italian Pinwheels provide a surprisingly good bridge to a side of Thai shrimp noodle salad or even a bowl of crunchy ramen noodle salad.
Frequently Asked Questions
Yes! These actually benefit from at least 2-4 hours in the fridge to set, and they remain fresh and delicious for up to 24 hours when tightly wrapped in plastic.
You can, but romaine is recommended for its ’emerald-green’ color and superior crunch, which provides a necessary textural contrast to the soft cream cheese and meats.
We do not recommend freezing them. The cream cheese and fresh lettuce will change texture significantly upon thawing, leading to a loss of the signature ‘crisp’ bite.
The key is moisture management. Always pat dry jarred ingredients like roasted red peppers with paper towels and use a thick layer of cream cheese to act as a moisture barrier for the tortilla.
A sharp serrated bread knife is essential. Use a gentle sawing motion rather than pressing down to maintain the ‘clean, sharp cross-sections’ without squishing the fillings.
The Official Cheesy Italian Pinwheels Recipe
Cheesy Italian Pinwheels: The Ultimate No-Bake Party Appetizer
Ingredients
Equipment
Method
- In a medium bowl, combine the softened cream cheese, dried oregano, and garlic powder. Mix until smooth and spreadable.
- Lay tortillas flat and spread a thick, even layer of the cream cheese mixture across the entire surface, leaving a small margin at the top edge.
- Layer provolone, Genoa salami, and pepperoni over the bottom two-thirds of the tortilla, overlapping slightly for a tight spiral.
- Scatter the shredded romaine and diced roasted red peppers across the center of the meat layers.
- Roll the tortilla tightly toward the clean edge. Wrap securely in plastic wrap and refrigerate for at least 2 hours to firm up.
- Using a serrated knife, slice into 1-inch (2.5cm) rounds. Dust with extra oregano and crushed red pepper flakes before serving.
Notes
Chill for at least 2 hours; this is the secret to the 'sharp' cross-section visual.
Closing & Call to Action
Mastering the art of the Cheesy Italian Pinwheels is a game-changer for any home cook. With their vibrant colors, clean spirals, and punchy Italian flavors, they are guaranteed to be the most requested recipe in your repertoire. If you loved the visual flair of this dish, be sure to leave a comment below and tell us how yours turned out! Don’t forget to snap a photo and tag us, or save this recipe to your “Appetizer” board by following KellyTaste on Pinterest.